How to Crochet a Magic Circle: The Ultimate Guide
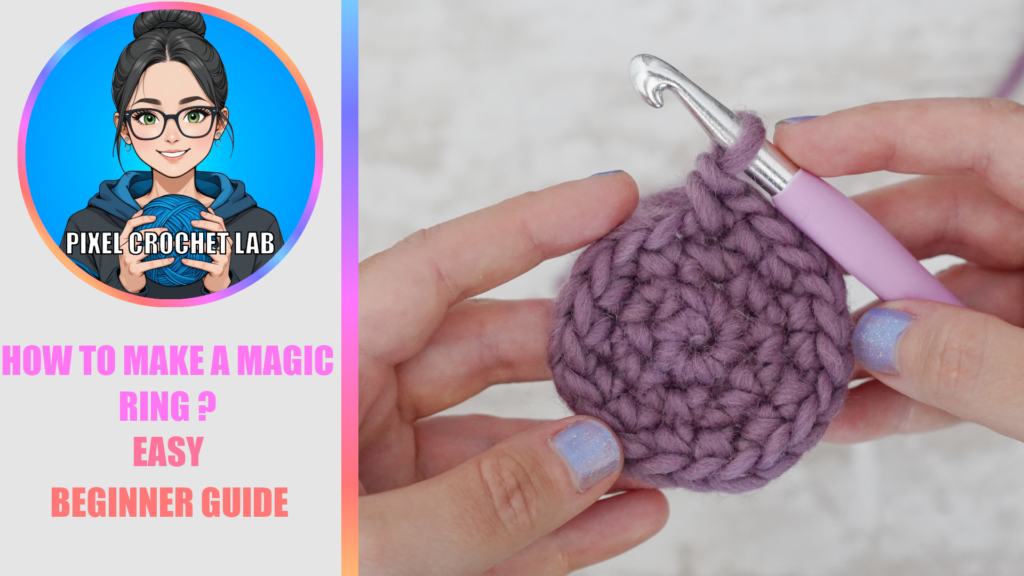
How to crochet magic ring? The ultimate guide. The magic circle is one of the essential techniques for learning how to crochet in round, especially when making Amigurumis. In this article, I am going to teach you how to create it in a clear and detailed way, whether through written instructions or via my YouTube video tutorial.
Mastering the Crochet Magic Ring. What is it used for?
The magic ring, also known as the magic loop or magic circle, is a fundamental crochet technique. It is primarily used to create amigurumis (those adorable figurines and plushies), keychains, or crochet dolls.
Unlike the traditional method of a starting chain closed with a slip stitch, the magic ring offers total control over the tightness and sturdiness of the beginning of your work. This guide details the applications of this technique and the precise steps to succeed.
Why Use the Magic Circle? (Technical Advantages)
The use of the magic ring isn’t just about aesthetics; it addresses specific structural requirements:
The use of the magic ring isn’t just about aesthetics; it addresses specific structural requirements:
- Increased Sturdiness: By encompassing the tail end of the yarn within the first stitches, you create an anchor that is more resistant to mechanical tension than a classic chain. Your work won’t pull open!
- Adaptability: You can create a magic ring of different sizes (for example, starting with 6, 7, or 8 single crochets). Warning: if you crochet too many stitches directly into the ring, it won’t close completely. This is possible for specific needs, but rarely desired in amigurumi.
- Perfect Seal: For stuffed volumes, the magic ring prevents the fiberfill stuffing from escaping. Good yarn tension, the right choice of cotton yarn, and a suitable stitch (like the “X” shaped single crochet) will do the rest.
- A Versatile Base: Beyond amigurumis, it serves as the foundation for many accessories: Mochila bags, coasters, beanies, baskets, bottle holders, and much more!
- Varied Shapes: Once closed, the ring is round, but as you progress through the rounds, you can give it the shape of a square, pentagon, hexagon, or even an oval thanks to increases. You can also choose not to close the ring at all to create a half-circle shape.
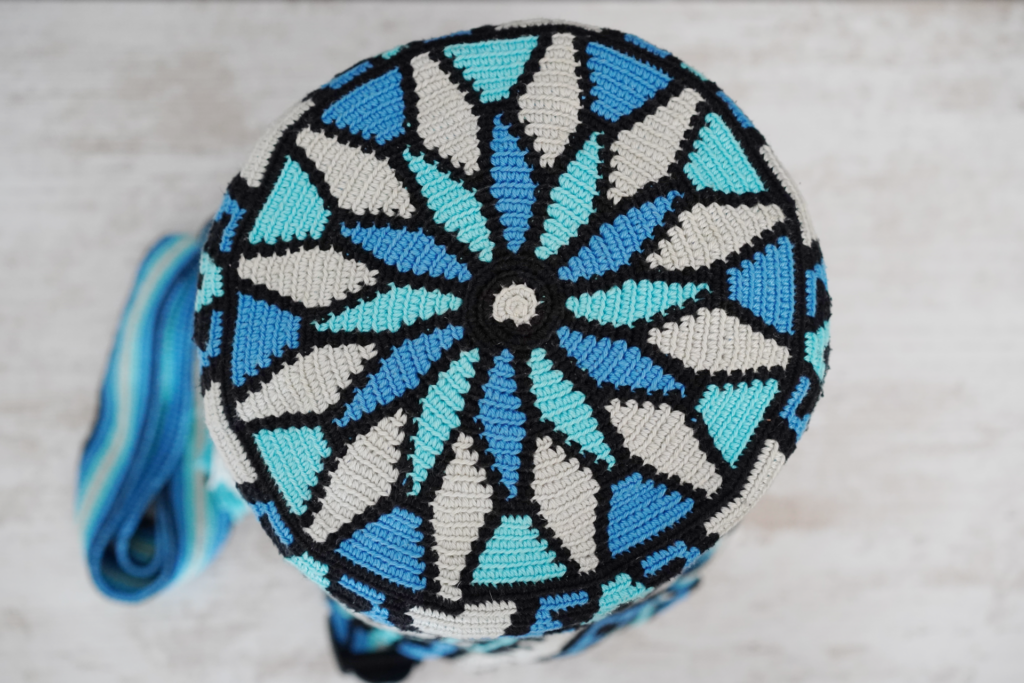
(Mochila “Wayuu” Bag worked in the round, starting from a magic ring of 6 single crochets)
How to make a crochet magic ring? The ultimate guide
Note: For left-handed crocheters, you should reverse the lateral directions.
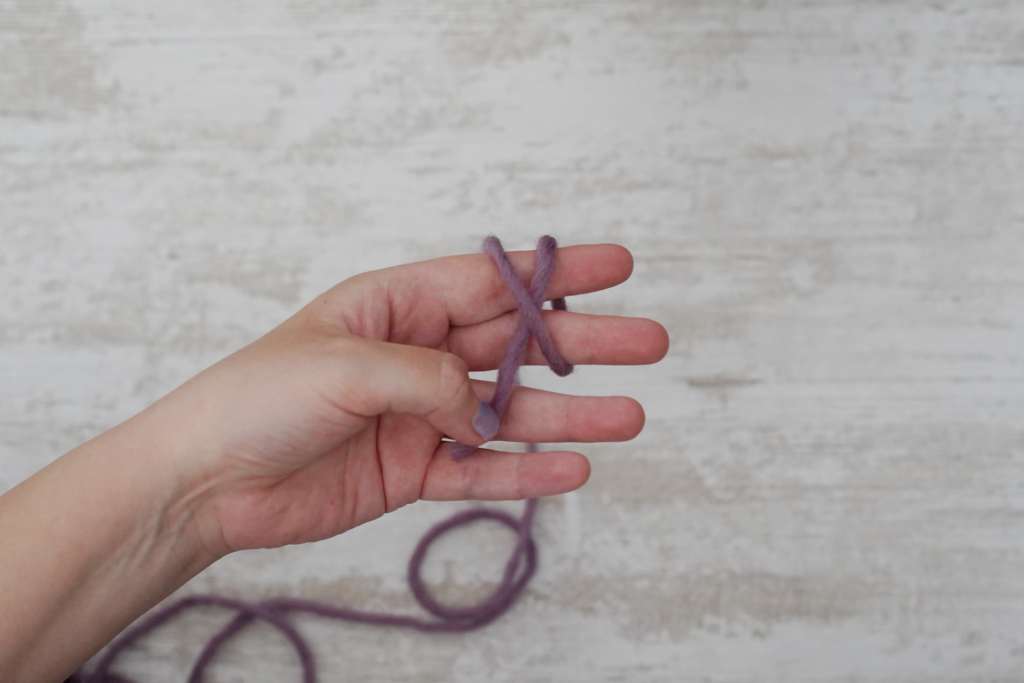
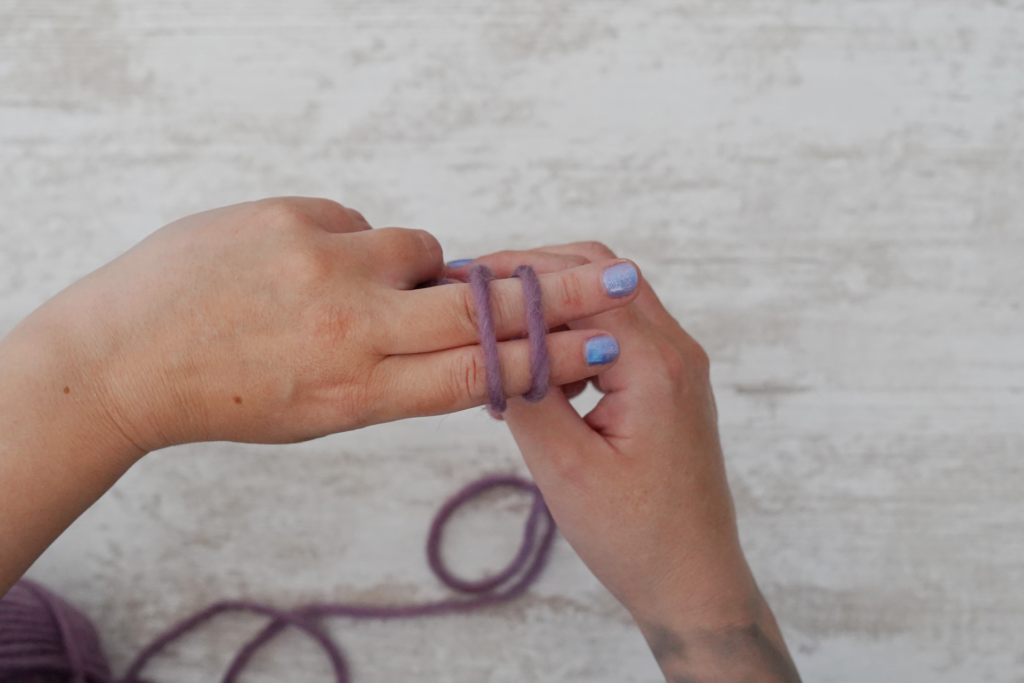
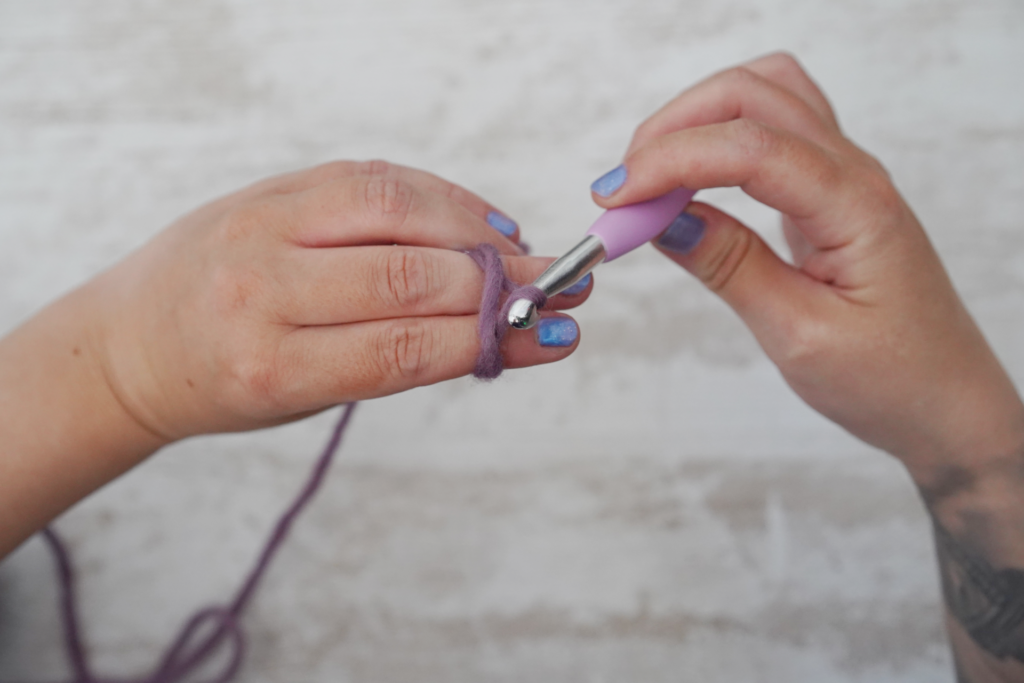
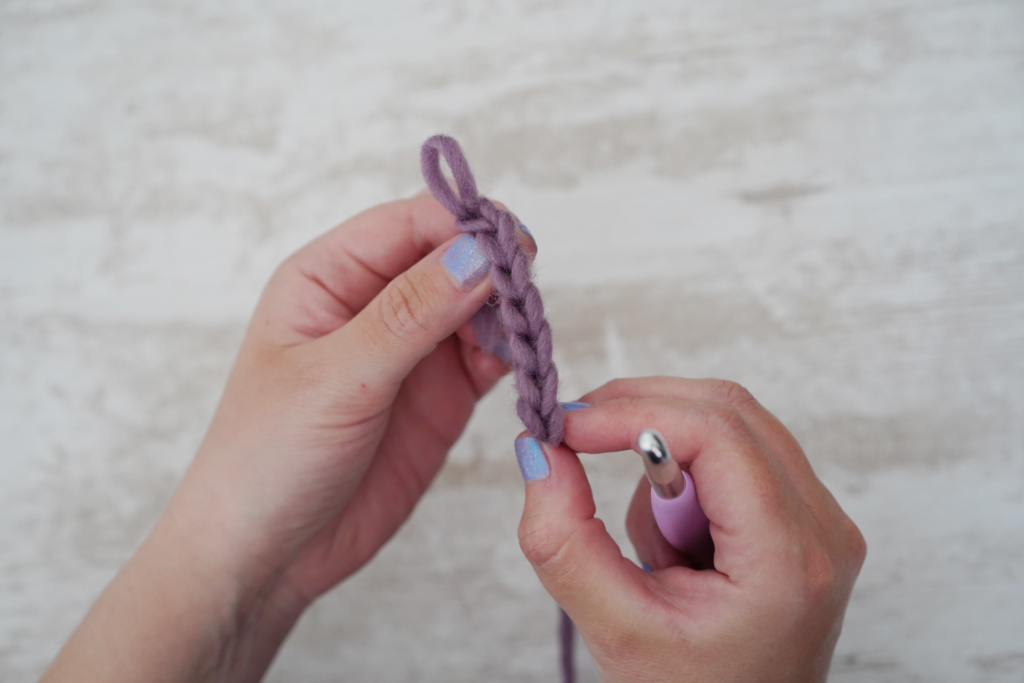
1. Positioning the yarn on your fingers
Wrap the working yarn (connected to the ball) around your index and middle fingers to form an “X” on the inside of your fingers. On the top side, the two strands of yarn should be parallel.
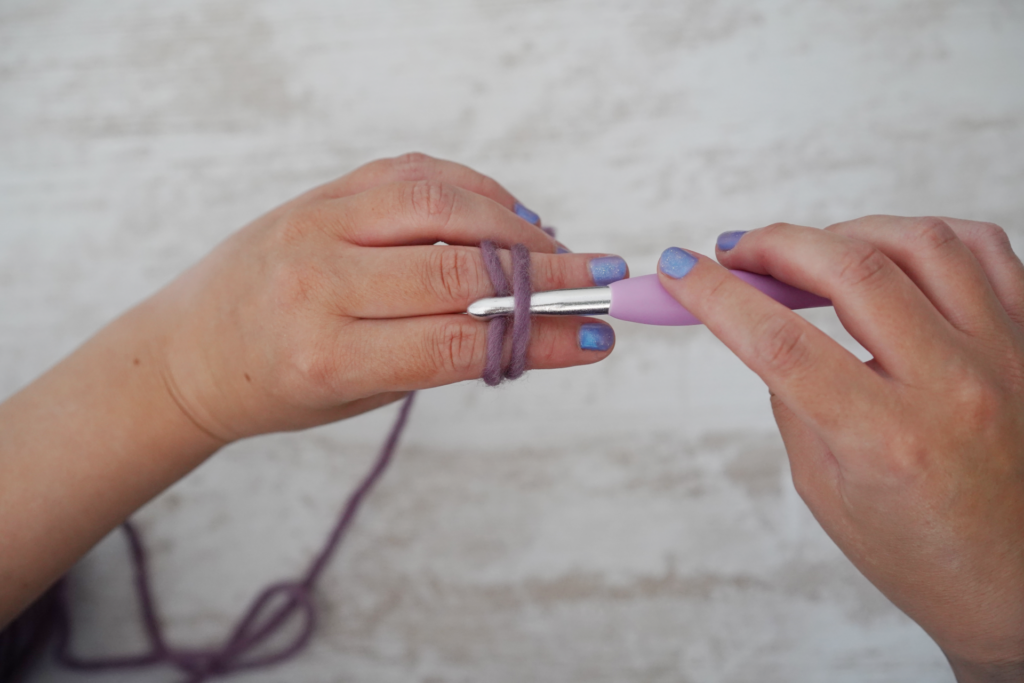
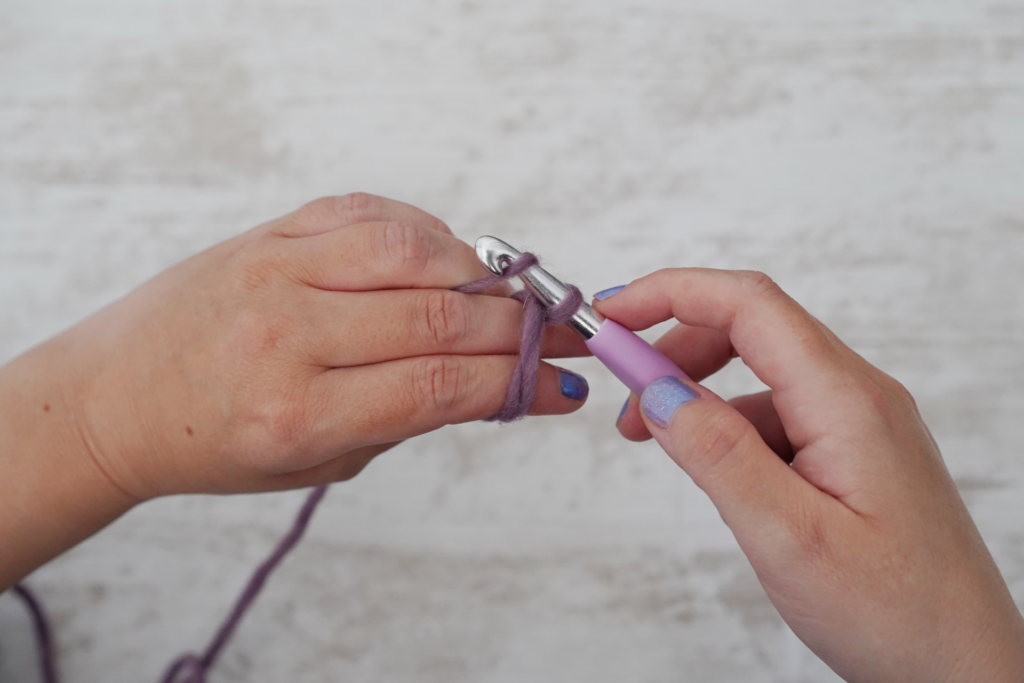
2. Catching the first strand with the hook
On the top side, insert the hook under the strand located on the right. Catch the strand located on the left and pull it under the first strand, while rotating the hook upwards to create a twist loop.
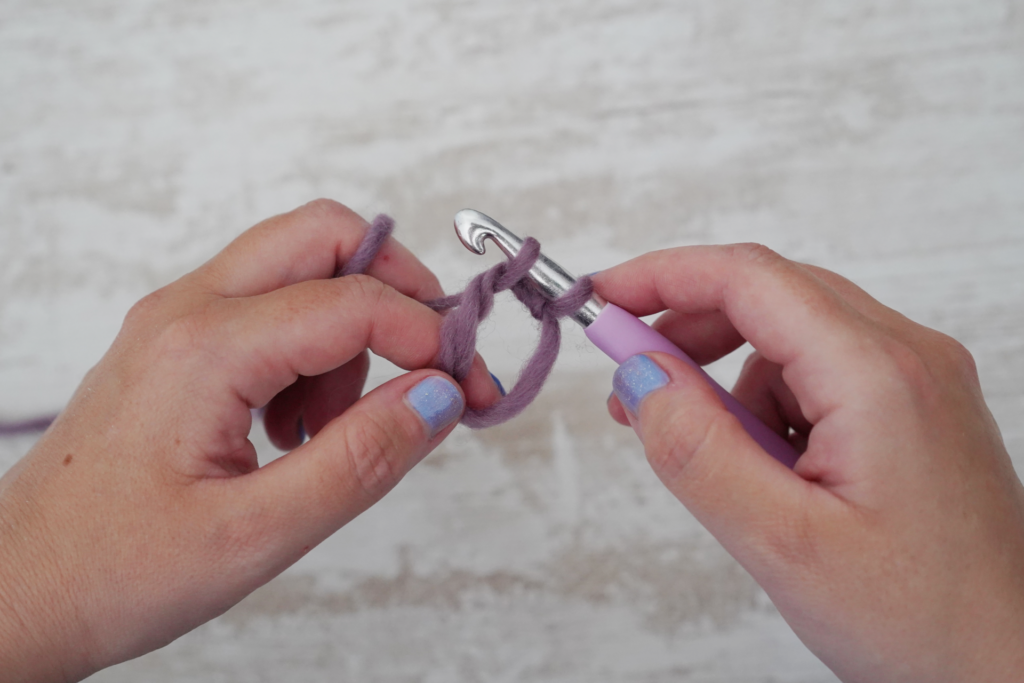
3. Catching the second strand & locking the ring
Without letting go of the yarn, yarn over with the working yarn (from the ball) and pull it through the loop already on the hook. This step serves as a secure chain. The ring is now “locked” and “secured”: you can safely remove your fingers from the circle.

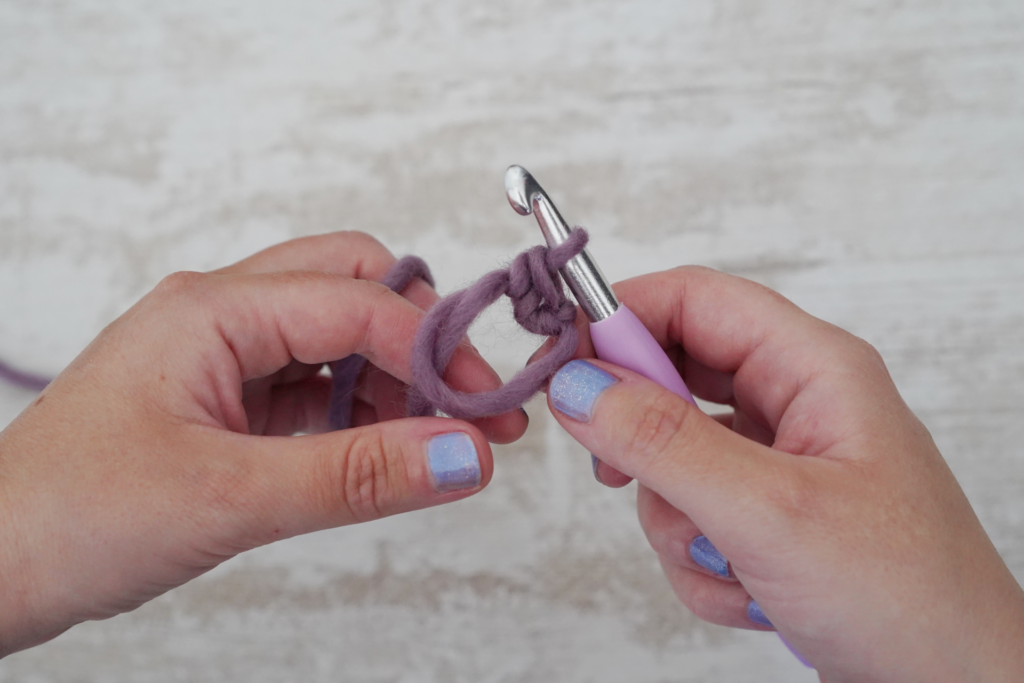
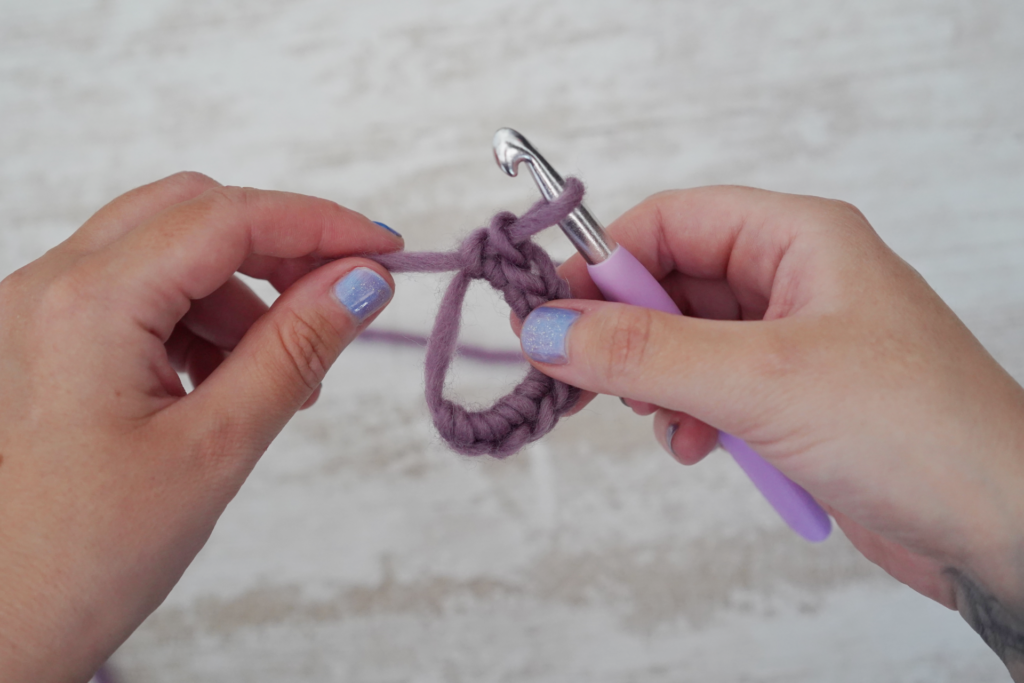
4. Crocheting the first round / row in single crochet
Work the number of single crochet stitches required by your pattern. To create a single crochet, it’s very simple.
- Insert the hook under both strands of the ring.
- Grab the yarn connected to the ball and pull it through to the front, passing it well under both strands of the magic ring.
- You then have two loops on your hook.
- Yarn over and pull the yarn through both loops.
You have just completed your first single crochet.
Please note: For the magic ring, work single crochet using the yarn over method only. You begin X-stitches shape (using yarn under, then yarn over method) starting from the second row / round.
Important: Your hook must absolutely pass under both strands (the main loop and the tail end). If you do not encompass the tail end, it will be impossible to close the ring.

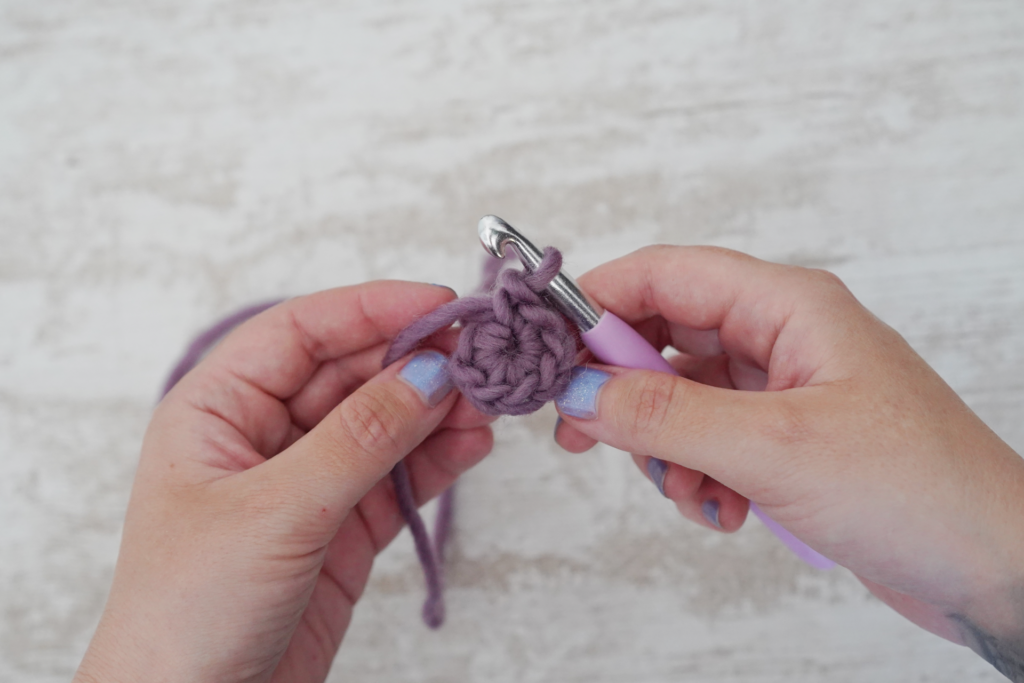
5. Tightening and closing the magic ring
Hold your stitches between your thumb and index finger. Firmly grasp the tail end and pull hard enough to close the hole completely. Then, simply follow the instructions of your pattern. The first stitch of round 2 is worked into the first stitch of the magic ring and serves to close the ring.
Troubleshooting, errors and solutions (Crochet FAQ)
Problem encountered: The ring does not slide; it’s impossible to pull the tail end.
Probable cause: The tail end got tangled in a yarn over or was not properly enclosed within the stitches of the magic ring.
Technical solution: Restart the magic ring.
Problem encountered: The center opens up on its own.
Probable cause: The tail end was not woven in.
Technical solution: Use a needle to weave the yarn in the opposite direction for about 3 cm, or carry the tail end along for 4 or 5 stitches during the second round.
Problem encountered: The stitches are distorted.
Probable cause: Irregular tension while creating the ring.
Technical solution: Restart, taking care not to apply too much tension when making the magic ring stitches. If you pull too tight, you won’t be able to insert your hook into the stitches for the second row / round; you will have to force it, which can cause pain in your hand or wrist.
Problem encountered: My ring won’t close.
Probable cause: There are too many stitches in the magic ring.
Technical solution: Generally, in a single crochet magic ring, you can work 6 to 8 starting stitches. Beyond that, the ring will not close properly. If you need 12 stitches, make a magic ring of 6, then in round 2, work 6 increases to reach 12; then in round 3, begin your round shape or other pattern.
Your first magic ring!
Congratulations! You have just successfully completed your first magic circle, and it no longer holds any secrets for you.
If you enjoy my tutorials, feel free to subscribe to my YouTube channel and give it a thumbs up ! it helps me a lot! You can also support me by purchasing a product from my Etsy Shop (if a pattern catches your eye, of course! :)).
If you would like tutorials on specific crochet topics, don’t hesitate to let me know in the comments of my videos! You can find all my available tutorials in the Crochet Tutorials & Tips section of the website.